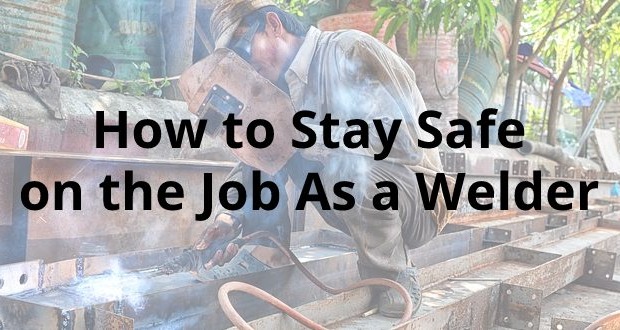
Introduction
Welding helmets are one of the most essential pieces of equipment any welding can have. These special helmets include goggles and a shield to protect the eyes and face from heat and sparks while trying to weld materials together. Without one, an individual is liable to lose an eye or end up burning themselves from stray sparks or out of control flames.
Naturally, welders want to make sure their helmets are in the best condition. Besides regular maintenance, there are some other things welders can do to make sure their helmets are up to snuff, including replacing the battery on a regular basis. If you have a helmet that does need a battery, here is how to change it in just about any welding helmet currently on the market.
When to Replace the Battery
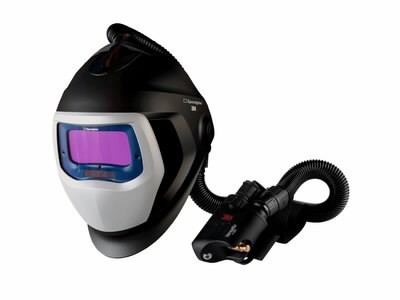
Before attempting to replace a battery, you should know that most welding helmets do not actually require batteries. The ones that do are specialized pieces of equipment that adapt to light changes, allowing welders to be protected and still able to see the area around them when using their instruments. If you have a regular helmet that only has the basic shield, then replacing a battery shouldn’t be an issue.
If your helmet does require a battery, then there is one major sign you can look for to determine whether or not it’s time for a replacement. Usually, you can tell when the battery is running out of energy because the helmet will no longer adapt well to light changes. This means the shield will no longer auto-darken when welding and you will be exposed to brighter, more intense light than usual. If you see this, it means the battery is going bad and it’s time to get a new one.
Be careful, as not all helmets powered by a battery include a method where you can actually change it. In some cases, you are expected to purchase a new helmet simply because the current one has run out of juice. While some people post tutorials on how to rip the helmet open, be wary of such DIY projects. Doing so can affect the effectiveness of the helmet and leave you vulnerable.
How to Change the Battery
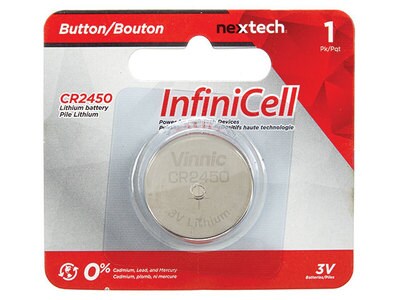
Most welding helmets need special batteries created by the manufacturer, although some popular types are Lithium CR2450 and the CR2330. Once you have the battery, you can get your other tools. The main thing you are likely to need is a screwdriver to open the battery panel, and that is it. In many cases, you won’t need tools at all.
Step 1: Locate
First, you need to know where the battery is. In most cases, this will be an easy to spot box near the top of the helmet, usually near a solar panel. If you can’t find one, you might have a helmet that takes a battery but is built so you can’t replace it. Some individuals advertise cutting into the helmet to remove the battery, but once you do this, you’re compromising the helmet’s safety, and that can be dangerous.
Step 2: Remove and Add
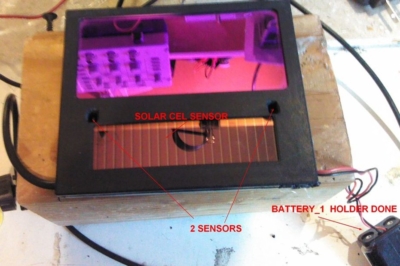
Once you’ve found the panel, you can place remove the old batteries. In most cases, the battery pack can be un-clipped and opened to reveal the batteries. In others, you might need to unscrew the lid for access. Once you see the battery, it’s as simple as pulling the old one out of place and putting the new one inside. Again, some people suggest cutting through the helmet to remove the battery, which can be done. However, you need to identify where the battery pack is first and then cut through the helmet near the solar panels, which can damage the internal mechanisms.
Step 3: Close and Test
Now that the batteries are inside, all you have to do is replace the battery panel by either clicking the lid back into place or screwing the removed piece back down. If you did decide to try and cut through the helmet, most individuals recommend hot gluing the removed segment back into place. You cannot use a piece of equipment that generates too much heat because it might damage the batteries and other sensitive pieces of the mechanisms inside the helmet.
Once you’re certain the batteries are in place, you can test the helmet. The easiest way to do this is to just step outside in the sunlight and see if the helmet automatically darkens. If it doesn’t, remove the panel to the battery unit once again and make sure the battery is locked down in place. If it is and the helmet still doesn’t work, try another battery or check the wiring that connects the battery to the darkening system. It’s possible there is a malfunction occurring that needs to be fixed.
If you did take apart the top of the helmet to change the battery, inspect your handiwork. It’s likely that you accidentally damaged part of the mechanism while rooting through the helmet, damaging the darkening system.
Unfortunately, if you cannot get the helmet to once again function properly, you can either continue to use the object as is or invest in a new one.
Conclusion
Changing the battery in a welding helmet should be a simple task, but sometimes even the simplest things can seem complicated when you’re unfamiliar with what you’re doing. Just follow these instructions and your automatic darkening welding helmet should be good as new in no time. Just remember to take care of the electrical and technical mechanisms and ensure all of the wires are in place.
What’s Next
Now that you know how to change the battery in a welding helmet, you can get back to doing what you love. If you liked this guide and would like to see more like it, check out our homepage. We also regularly post tips, tricks, and product reviews related to all things in the welding industry for professionals and amateurs alike.